How to Mount a Motorcycle Dash Cam: Helmet & Handlebar Guide
- Choose the most stable location that keeps the lens level and your controls unobstructed.
- Handlebar mounting suits everyday recording; helmet mounting follows your line of sight.
- Use a short test recording to check vibration, horizon, glare, and cable clearance before riding.
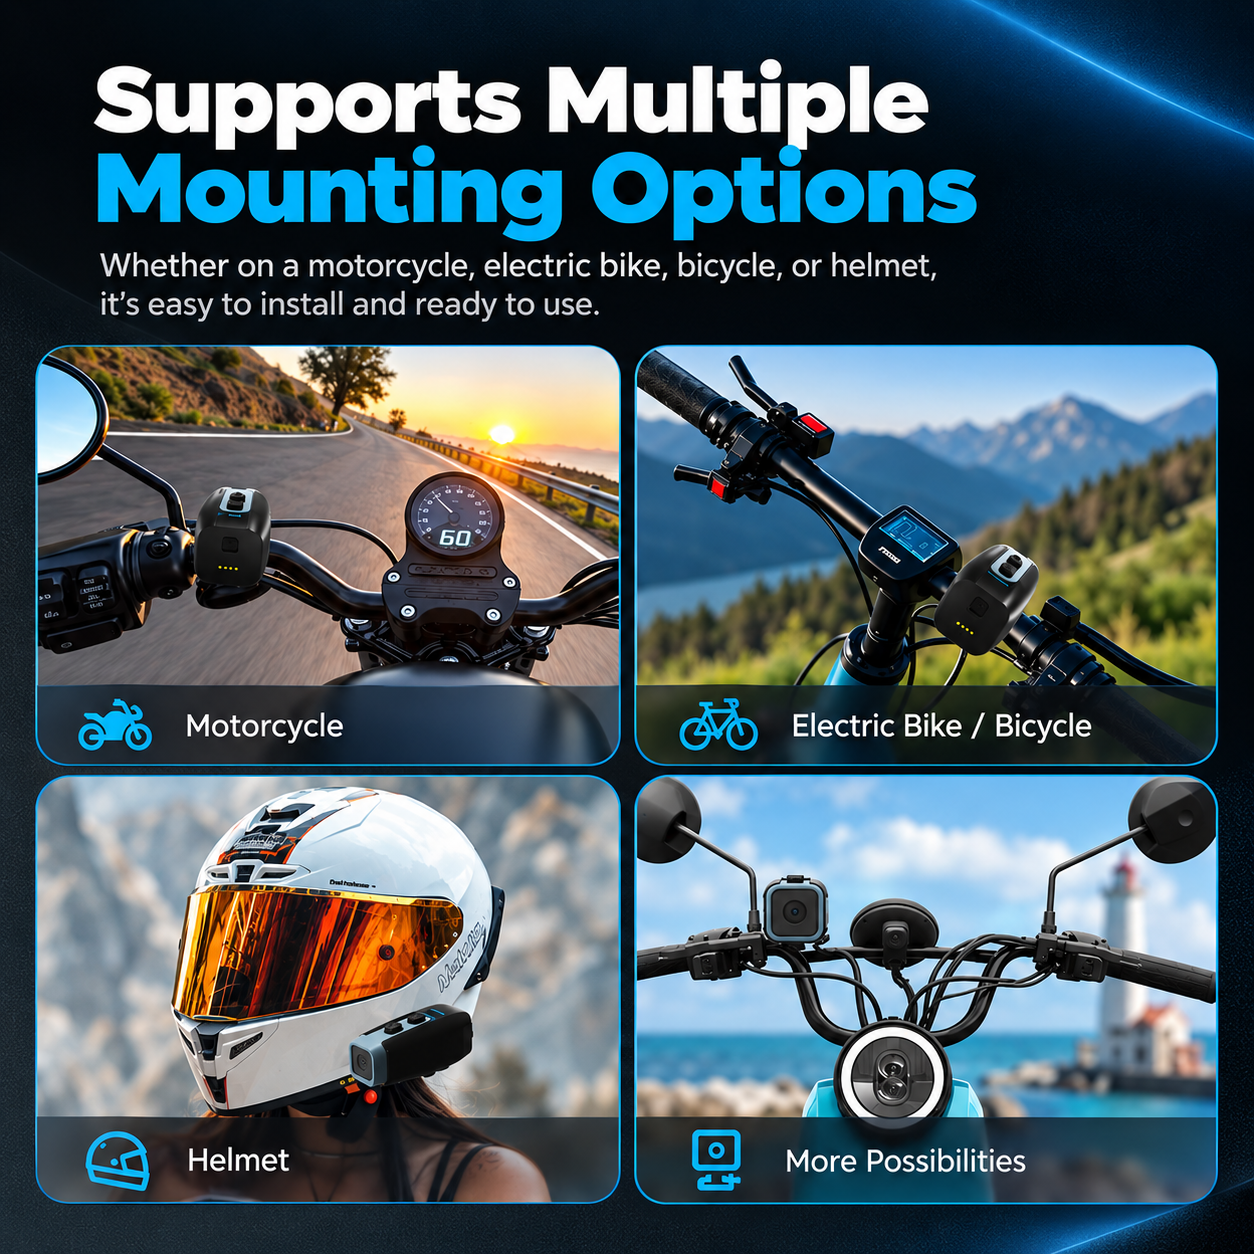
- Cam-S and Cam-X support helmet, handlebar, and bicycle mounting.
A good motorcycle dash cam mount does more than hold a camera. It determines what the camera can see, how much vibration reaches the footage, and whether the setup stays out of your way. The best position is stable, gives the lens a clear forward view, and does not interfere with steering, switches, the visor, or normal body movement.
This guide explains how to position a compact ride camera on a motorcycle, electric bike, bicycle, or helmet. It also covers the checks that matter before the first ride. The same principles apply to the SCSETC Cam-S and Cam-X, which support helmet, handlebar, and bicycle mounting.
Choose the Mount Before You Choose the Angle
Start with the vehicle and the kind of footage you want. A fixed handlebar camera records the road in front of the vehicle. A helmet-mounted camera follows your head movement and captures more of what you look toward. Bicycle and e-bike installations use the same basic approach as a handlebar setup, but the smaller bar diameter and greater road vibration make tightening and alignment especially important.
| Mounting position | Best for | Main check |
|---|---|---|
| Motorcycle handlebar | Daily commuting and consistent forward footage | Full steering clearance at both locks |
| E-bike or bicycle handlebar | Urban riding, touring, and cycle routes | Secure grip on the correct bar diameter |
| Helmet | Point-of-view footage that follows your gaze | Balanced placement that does not affect the visor or vents |
| Compatible accessory mount | Alternative viewpoints or a second vehicle | Mount compatibility and a secure secondary retention method |
Option 1: Motorcycle Handlebar Mount
A handlebar mount is the simplest choice for most riders. The view remains centered on the motorcycle, which makes clips easier to compare and review. It also keeps the camera within reach when you need to remove it after parking.
- Find a clear section of the bar. Keep the mount away from switches, reservoirs, cables, and moving control levers.
- Check steering movement. Turn the bars fully left and right before tightening. Nothing should pull, pinch, or touch the camera.
- Level the lens. Use the road horizon or a building edge as a reference. A slightly downward angle usually records more useful road surface without filling the frame with sky.
- Make a vibration test. Record 30 to 60 seconds at idle and during a short low-speed ride. If the picture shakes, move the mount closer to the bar clamp or another rigid section.
Option 2: Electric Bike or Bicycle Mount
For e-bikes and bicycles, put the camera where brake cables, a display, lights, and bags cannot block the lens. The center section of the handlebar often gives a balanced view, while an offset position may be necessary when a display already occupies the center.
Confirm that the mount matches the bar diameter and remains tight over rough surfaces. After installation, compress the front suspension if the bike has one and turn the bar fully in both directions. The camera must not touch a basket, cable, frame, or display.
Option 3: Helmet Mount
A helmet camera creates a natural point-of-view recording because it follows your line of sight. Side mounting can keep the top vents clear and make the controls easier to reach, while chin or top positions may give a more centered view when the helmet and compatible mount allow them.
Follow the helmet manufacturer's instructions before attaching anything to the shell. Do not drill the helmet or cover safety labels and vents. Keep the camera clear of the visor mechanism, confirm that it cannot strike your shoulder when you turn your head, and check local rules for helmet-mounted accessories.
Seven Checks Before Your First Ride
- Clean the contact area. Dust, oil, or wax can reduce the grip of a clamp or adhesive mounting surface.
- Tighten the mount evenly. The camera should not rotate by hand, but excessive force can damage a plastic mount or bar finish.
- Confirm a clear field of view. Keep the lens away from the windscreen edge, cables, helmet peak, mirrors, and luggage.
- Check the horizon. A level frame is easier to watch and gives a more useful record of road position.
- Inspect control clearance. Steering, braking, shifting, visor movement, and ventilation must work normally.
- Record a test clip. Review sharpness, reflections, vibration, and whether the license plate area ahead is visible under typical riding conditions.
- Recheck after the first ride. Road vibration can settle a new mount. Inspect and retighten it according to the mount instructions.
How to Reduce Vibration in Dash Cam Footage
Mount the camera to a rigid part of the vehicle and keep the adapter stack as short as possible. Long extension arms amplify movement. If one side of the handlebar produces visible shake, test a position closer to the center clamp. On a bicycle, also check tire pressure and loose accessories because a moving light or bag can look like camera shake in the recording.
Image quality also depends on lens cleanliness. Wipe away fingerprints, road spray, and dust with a soft lens-safe cloth. Review another short clip after adjusting the position rather than assuming the live view will match the road footage.
Cam-S or Cam-X for Your Mounting Setup?
Both models use the same three mounting categories and share a 2600mAh battery, up to 10 hours of listed video working time, IP67 protection, WiFi data transfer, and app-controlled focusing. The main choice is recording resolution:
- Cam-S: 1080P FHD for practical daily recording and smaller video files.
- Cam-X: 4K FHD when maximum image detail and more cropping flexibility matter.
For a full feature comparison, read Cam-S vs Cam-X: Which SCSETC Motorcycle Dashcam Is Right for You?
Frequently Asked Questions
Where is the best place to mount a motorcycle dash cam?
For most riders, a rigid handlebar position with a clear forward view is the easiest starting point. The best exact location depends on the motorcycle controls, windscreen, cables, and the amount of vibration at each mounting point.
Can I mount the Cam-S or Cam-X on a bicycle?
Yes. Both product specifications list bicycle mounting as a supported option. Check that the mount fits the handlebar diameter and does not interfere with brakes, shifting, lights, or a display.
Can a motorcycle dash cam be mounted on a helmet?
Cam-S and Cam-X support helmet mounting. Follow the helmet and mount instructions, avoid drilling or altering the helmet shell, and confirm local rules before riding.
How can I tell if the camera angle is correct?
Record a short clip on the road you normally ride. The horizon should be level, the road ahead should occupy most of the frame, and the lens should not be blocked by the motorcycle, helmet, cables, or accessories.
Explore the Cam series
Compare 1080P Cam-S and 4K Cam-X, or contact SCSETC for distribution, OEM, and bulk-order information.
View Cam-S View Cam-X